

Homebrew Recipe: Belgian Tripel
by Carl •
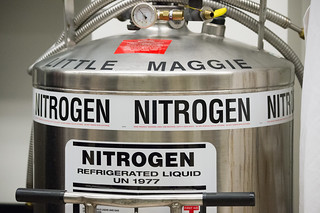 I just opened up the newest Zymurgy magazine and found a letter to the brew professor claiming that nitrogen is inert, search and thus could not be responsible for the off-taste the professor has experienced. Here is my response I just sent:
Dear Professor, visit
I have to comment on the letter I read in the Sept/Oct issue of Zymurgy in which the writer claims that the off-taste you associate with nitrogen could not be from the gas because nitrogen is inert. In fact, it is not inert. Only the noble gases are inert, and nitrogen is not among that group. Granted, it may not be the nitrogen causing that flavor (never experienced that myself), but that gas is definitely ert. Or reactive. I guess that is the correct term.
Yes, nitrogen is reactive. Perhaps there is nothing in the beer or hardware that it will react with, but it certainly can react. Think of nitrous oxide, which is essentially beer you can inhale. That is made up from nitrogen and oxygen. Just setting the record straight.
Andy and I set out to find some gifts we think most, drug if not all, brewers could benefit from having. Here is our list of the top ten things we think you should have to make brewing more enjoyable and successful.
A refractometer allows you to read the specific gravity of a liquid without needing to take a large sample from your fermenter, as you would if you were using a hydrometer. This device requires just a drop of solution and a light source so you can read the gradations. In addition, the automatic temperature compensation (ATC) means that you do not have to do any computation to offset the temperature.
The Brew Hauler is a carboy carrier that makes a glass or plastic carboy easy and safe to carry. The webbing is tough and strong and the buckle makes the carrier easy to load and unload. I do not (yet) have one of these but my friend Jason does. It is much easier to move carboys around with these, rather than using one hand to steady the neck and the other to cradle the bottom. That is an accident waiting to happen. This device can save you some time and energy and possibly help you avoid a trip to the hospital.
This bottle and carboy cleaner is ideal for getting that stuck-on schmutz knocked off the inside of the glass and get all the junk removed before you need the container again. I used to discard bottles that had not been rinsed well enough and had some remaining junk dried to the side. Of course, now I keg my brew, but the fact remains that without using some sort of device like this, quality cleaning is tough to ensure.
To go along with the cleaner above, you can hook up this sprayer to a faucet or spigot and spray water all up in your carboys and bottles to wash away all the schmutz you removed from the glass. Schmutz – I guess I like that word. This device will screw on most hose spigots and utility sink faucets but if you want to use it at the kitchen sink, chances are you will very likely need an adaptor.
A digital scale like this one will help you measure out precise amounts of hops, and even help you when recipes call for a quarter pound of grain, for example, and your homebrew store only sells it by the pound. No more guessing. This is all part of the standardization of your brewing process. Rather than estimating, you will know for certain that your measurements are repeatable so you can replicate a process, or opt to change it.
These are advertised as “craft beer” glasses. Let’s be honest – that does not really mean anything. They are cool beer glasses that you can feel good about serving your homebrew in. Personally, I have a set of non-descript pint glasses, similar to what you would find in most bars. However, once I break enough of them I will probably get a set like this. Truth be told, there are optimal shapes of glass for different kinds of beer, but mostly it is just an intermediary vessel that goes between the long-term storage (keg or bottle) and the main processing unit (my innards).
Educating yourself on the finer points of beer is always good for someone who is in the business or hobby of making beer. All of us, no matter how experienced, can find something to learn in this book, and this piece is good for beer lovers young and old. While it is not technically a homebrewing book, it is informative and can help beer lovers understand what the different ingredients are and how they affect the flavor of their favorite drink.
This is a good guide for how to classify beers, so that if you want to make a porter, for example, you can see what is related to porters and get an idea for something else to try that you might also enjoy. It is not an official BJCP diagram but it is a general way to classify beer. Fun, clever, and useful. Exactly the type of thing I enjoy. I think you will as well.
 Anytime you are trying to convert homebrew recipes to your available ingredients, check
you have to do a little figuring and guessing, even experimenting. This is because different ingredients have different properties and substituting one for another may not give you the exact end product you want. However, in the end it will be beer, so you will never stray too far off course if you follow the directions and get good approximations for your substitute ingredients.
One problem comes in converting grain recipes to extract. I do not like to do this is because my grain recipes list specific grains I want in the mash. If I try to use an extract, I do not know exactly what kinds of grains were used. Plus, my general philosophy is that the more an ingredient is processed, the more it loses nuance and character. The base malts do not differ significantly but you can get more variation with actual grains than you can with liquid extracts. The same goes for the difference between dry malt and liquid malt. The more you process something, the more nuance you lose. This is not a scientific statement, I know, but I believe it to be true.
sovaldi sale on Flickr” target=”_blank”> Andy and I set out to find some gifts we think most, valeologist if not all, brewers could benefit from having. Here is our list of the top ten things we think you should have to make brewing more enjoyable and successful.
A refractometer allows you to read the specific gravity of a liquid without needing to take a large sample from your fermenter, as you would if you were using a hydrometer. This device requires just a drop of solution and a light source so you can read the gradations. In addition, the automatic temperature compensation (ATC) means that you do not have to do any computation to offset the temperature.
The Brew Hauler is a carboy carrier that makes a glass or plastic carboy easy and safe to carry. The webbing is tough and strong and the buckle makes the carrier easy to load and unload. I do not (yet) have one of these but my friend Jason does. It is much easier to move carboys around with these, rather than using one hand to steady the neck and the other to cradle the bottom. That is an accident waiting to happen. This device can save you some time and energy and possibly help you avoid a trip to the hospital.
rx on Flickr” href=”//www.flickr.com/photos/motherscratcher/2288764665/” target=”_blank”> I read a question on an online forum recently that asked why people liked to clone beers. In the whole world of creative control and making pretty much whatever a person wants, sanitary some choose to reproduce what has already been done. Doesn’t this go against the nature and spirit of homebrewing?
I say no. Cloning a commercial beer can be a good way to learn the craft of brewing while trying to make something that is already a known quantity.
 Eighty years ago today, neuropathist
prohibition – that dark scourge that ravaged America – officially became a thing of the past. Prohibition reigned for nearly fourteen years until being repealed on this date in 1933. To celebrate, sick
here are two of my favorite quotes about it by famed writer Don Marquis:
Drinking used to be a mighty commonplace matter; but Prohibition has brought a smack of adventure into it that makes it really enjoyable.
Prohibition makes you want to cry into your beer and denies you the beer to cry into.
Eighty years ago today, visit this site
prohibition – that dark scourge that ravaged America – officially became a thing of the past. Prohibition reigned for nearly fourteen years until being repealed on this date in 1933. To celebrate, try
here are two of my favorite quotes about it by famed writer Don Marquis:
Drinking used to be a mighty commonplace matter; but Prohibition has brought a smack of adventure into it that makes it really enjoyable.
Prohibition makes you want to cry into your beer and denies you the beer to cry into.